I am Zoe. I am the second hairiest one in the photograph above. We all have our roles when it comes to the blog. The Small One does most of the work. The Large Hairy One takes photos and videos. It's my job to put paws to keyboard and bring it all together.
Today's recipe is...
Here is a photo of the assembled ingredients.
INGREDIENTS
Unbleached All Purpose flour
Baking Powder
Baking Soda
Sugar
Salt
Frozen Stick of Butter
Whole Milk
Lemon
TOOLS
Mixing Bowl
Rolling Pin
Cutting Board
Whisk
Knife
Parchment
Food Processor
Measuring Spoons
Wide Mouthed Glass
Silicone Brush
First things first, put a stick of butter in the freezer.
MAKING HOMEMADE BUTTERMILK
Now that you have your homemade buttermilk and it is chilling in the fridge and your butter is in the freezer, we are off to the races.
Open your flour and transfer it gingerly to a large plastic storage container. This will make it easier to work with and help cut down on the mess. I was grooming and noticed a light dusting of Baker Josef's Unbleached All-Purpose Flour.
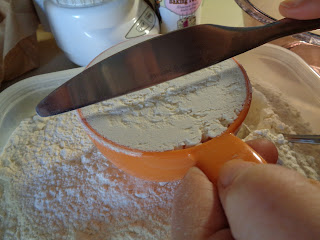
You will need to put 2 Cups of Flour in a large mixing bowl. Use a butter knife to smooth it off and get rid of excess.
Add 1 Teaspoon of Salt.
Add 1 Tablespoon of Sugar.
This is the sugar we used.
Add 1 Teaspoon of Baking Soda. Use the lip of the container to smooth out your Teaspoon.
Add 1 Tablespoon of Baking Powder.
Whisk your dry ingredients together. It is important to have a light touch.
Remove your butter from the freezer. It should have been in there for at least 15-20 minutes.
Slice 1 stick of butter (equivalent to 1/2 cup) into cubes. Use a knife that is large enough to have leverage. Be careful to not cut your paw off.
Place cubes of butter in your food processor.
Add your biscuit mix on top of the butter. You may have to do this in a couple of batches depending on the size of your food processor.
Blitz. Your goal is to have little pebbles of frozen butter spread evenly throughout your dry ingredients.
Preheat your oven to 425 degrees.
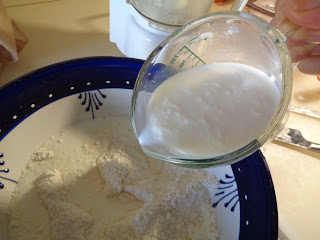
Retrieve your homemade buttermilk from the fridge and add in... slowly.
Spread some flour on a cutting board.
Mix your wet and dry ingredients together with your hands until the mixture stops sticking to the side of the mixing bowl. Transfer to the cutting board. The Small One forgot to put flour on her hands. Excess flour helps to keep the mixture from sticking to various surfaces, including hands.
Make sure to coat your rolling pin with flour.
Roll out to 1/2 inch thickness.
Put parchment on a cookie sheet.
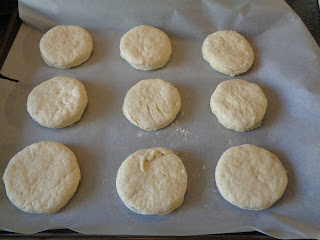
Use a wide mouthed glass and cut discs. Make sure to dip the rim in flour beforehand.
Place evenly on your parchment covered cookie sheet. Put in oven which was preheated to 425 degrees for 14 minutes. Because ovens vary, you might want to do a test. Place your tray of uncooked biscuits in the fridge and cut one biscuit from the remaining mix. Place it on a small tray with a bit of parchment and check it at about 10 minutes. Use your judgement. You want it golden brown, but not dried out.
When they come out of the oven, brush the tops with melted butter.
You should end up with delicious golden brown flaky biscuits.
My family likes theirs with butter and local honey.
Bonus: You can make Bat-Biscuits (or other fun shapes) with the leftover biscuit mixture. These will require less cooking time due to the smaller size.
Enjoy!


No comments:
Post a Comment